

How to Create a DIY School Memory Box (Step-by-Step for Busy Moms)
You blink… and suddenly they’re bringing home their very first school preschool artwork.
A crayon drawing of your family with giant heads and seven fingers each
A paper apple with a big wobbly letter ‘A’ on it
And the first worksheet where they wrote their name…all by themselves
All completely perfect. So, of course, you save them.
But then more papers came home.
…and more.
Soon you have stacks on the kitchen counter…piles in drawers…and a vague plan to “organize them someday.”
Sound familiar?
Well, today is that day!
These school years move fast. And the little moments you want to remember deserve a place to live.
So today I want to show you how to create a DIY school memory box for your child — step by step — using simple supplies you’re probably already familiar with.
I’ll show you how to set up five crucial elements:
1. Choose a box
2. Personalize the box with your child’s name
3. Set up folders for each school year
4. Label the folders so memories stay organized
5. Add a few meaningful pages each year
Then, at the end, I’ll show you one big way you can make it 1000% easier to start your kids’ memory box.
But first, let’s start with the box…
1. Choose a Box for Your Child’s School Memories
First, you need a dedicated place for all those school memories.
Nothing fancy required.
You can use:
A plastic file box
A decorative keepsake box
A storage bin
A banker’s box with a lid
The only real requirement is that the box should be large enough to hold 8 1/2 x 11-inch papers without folding them.
I personally love a file-style box that holds hanging folders. It keeps everything upright and easy to flip through.
Once you have the box, you’ve already done the hardest part.
You’ve created a home for the memories.
Next, personalize it.
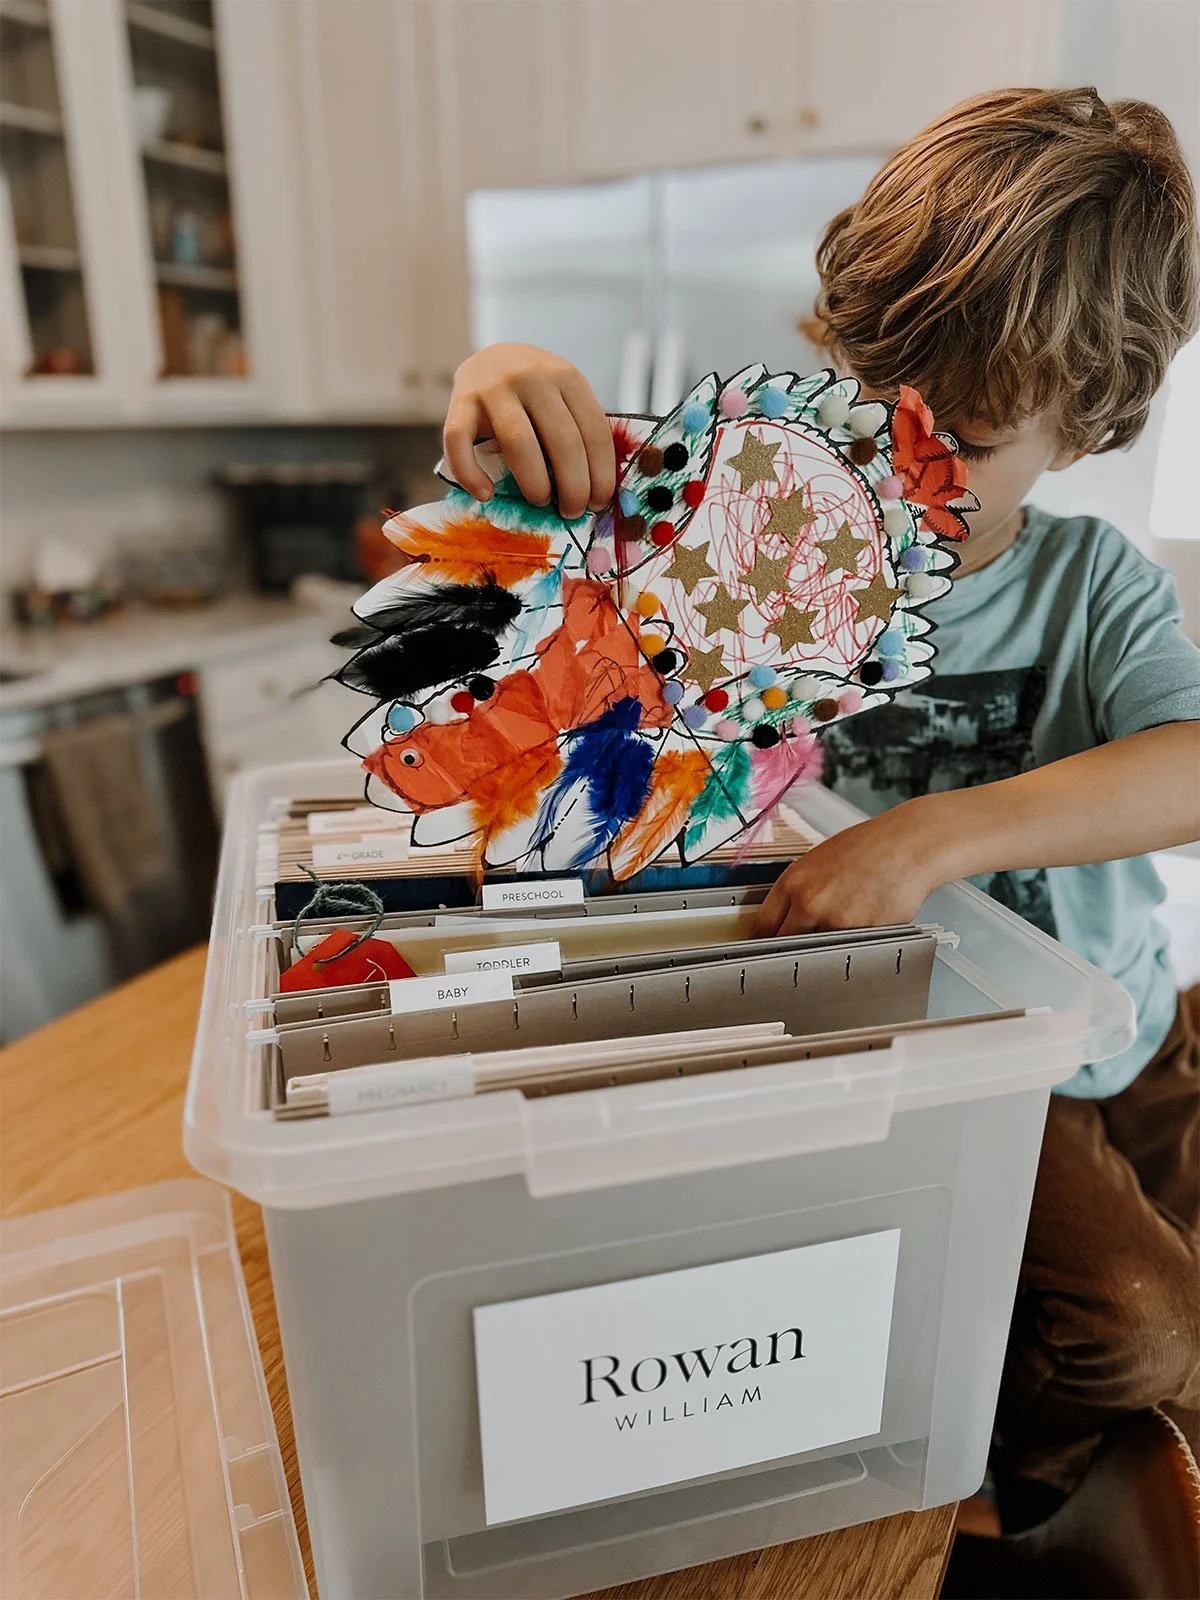
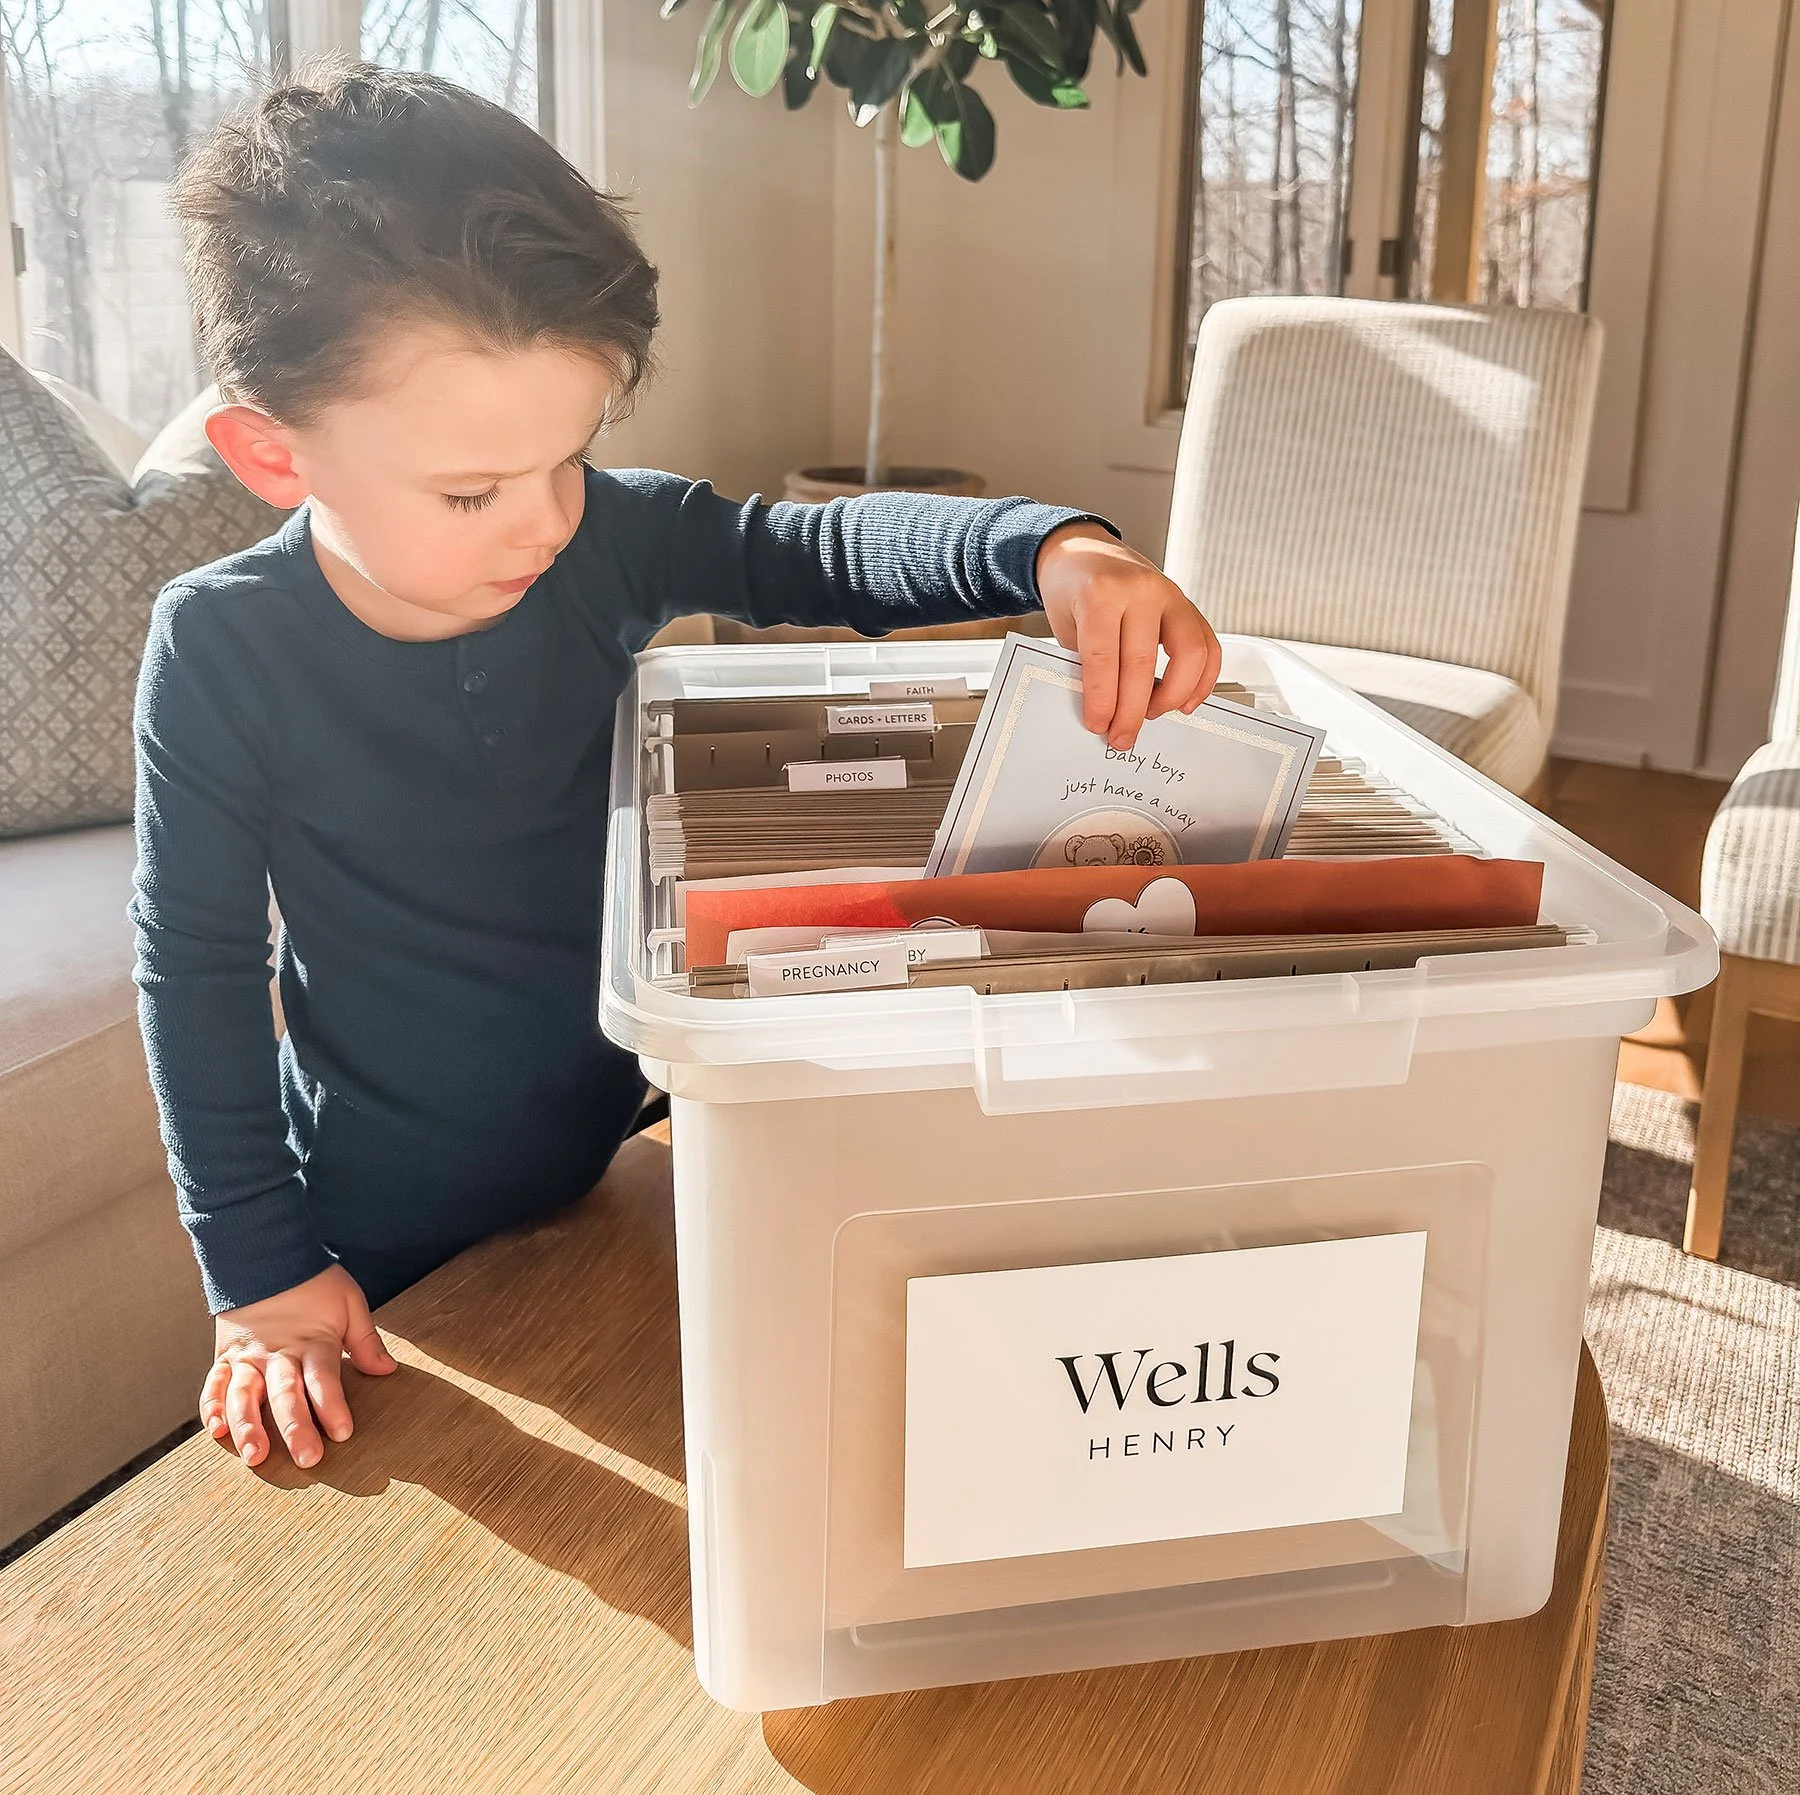
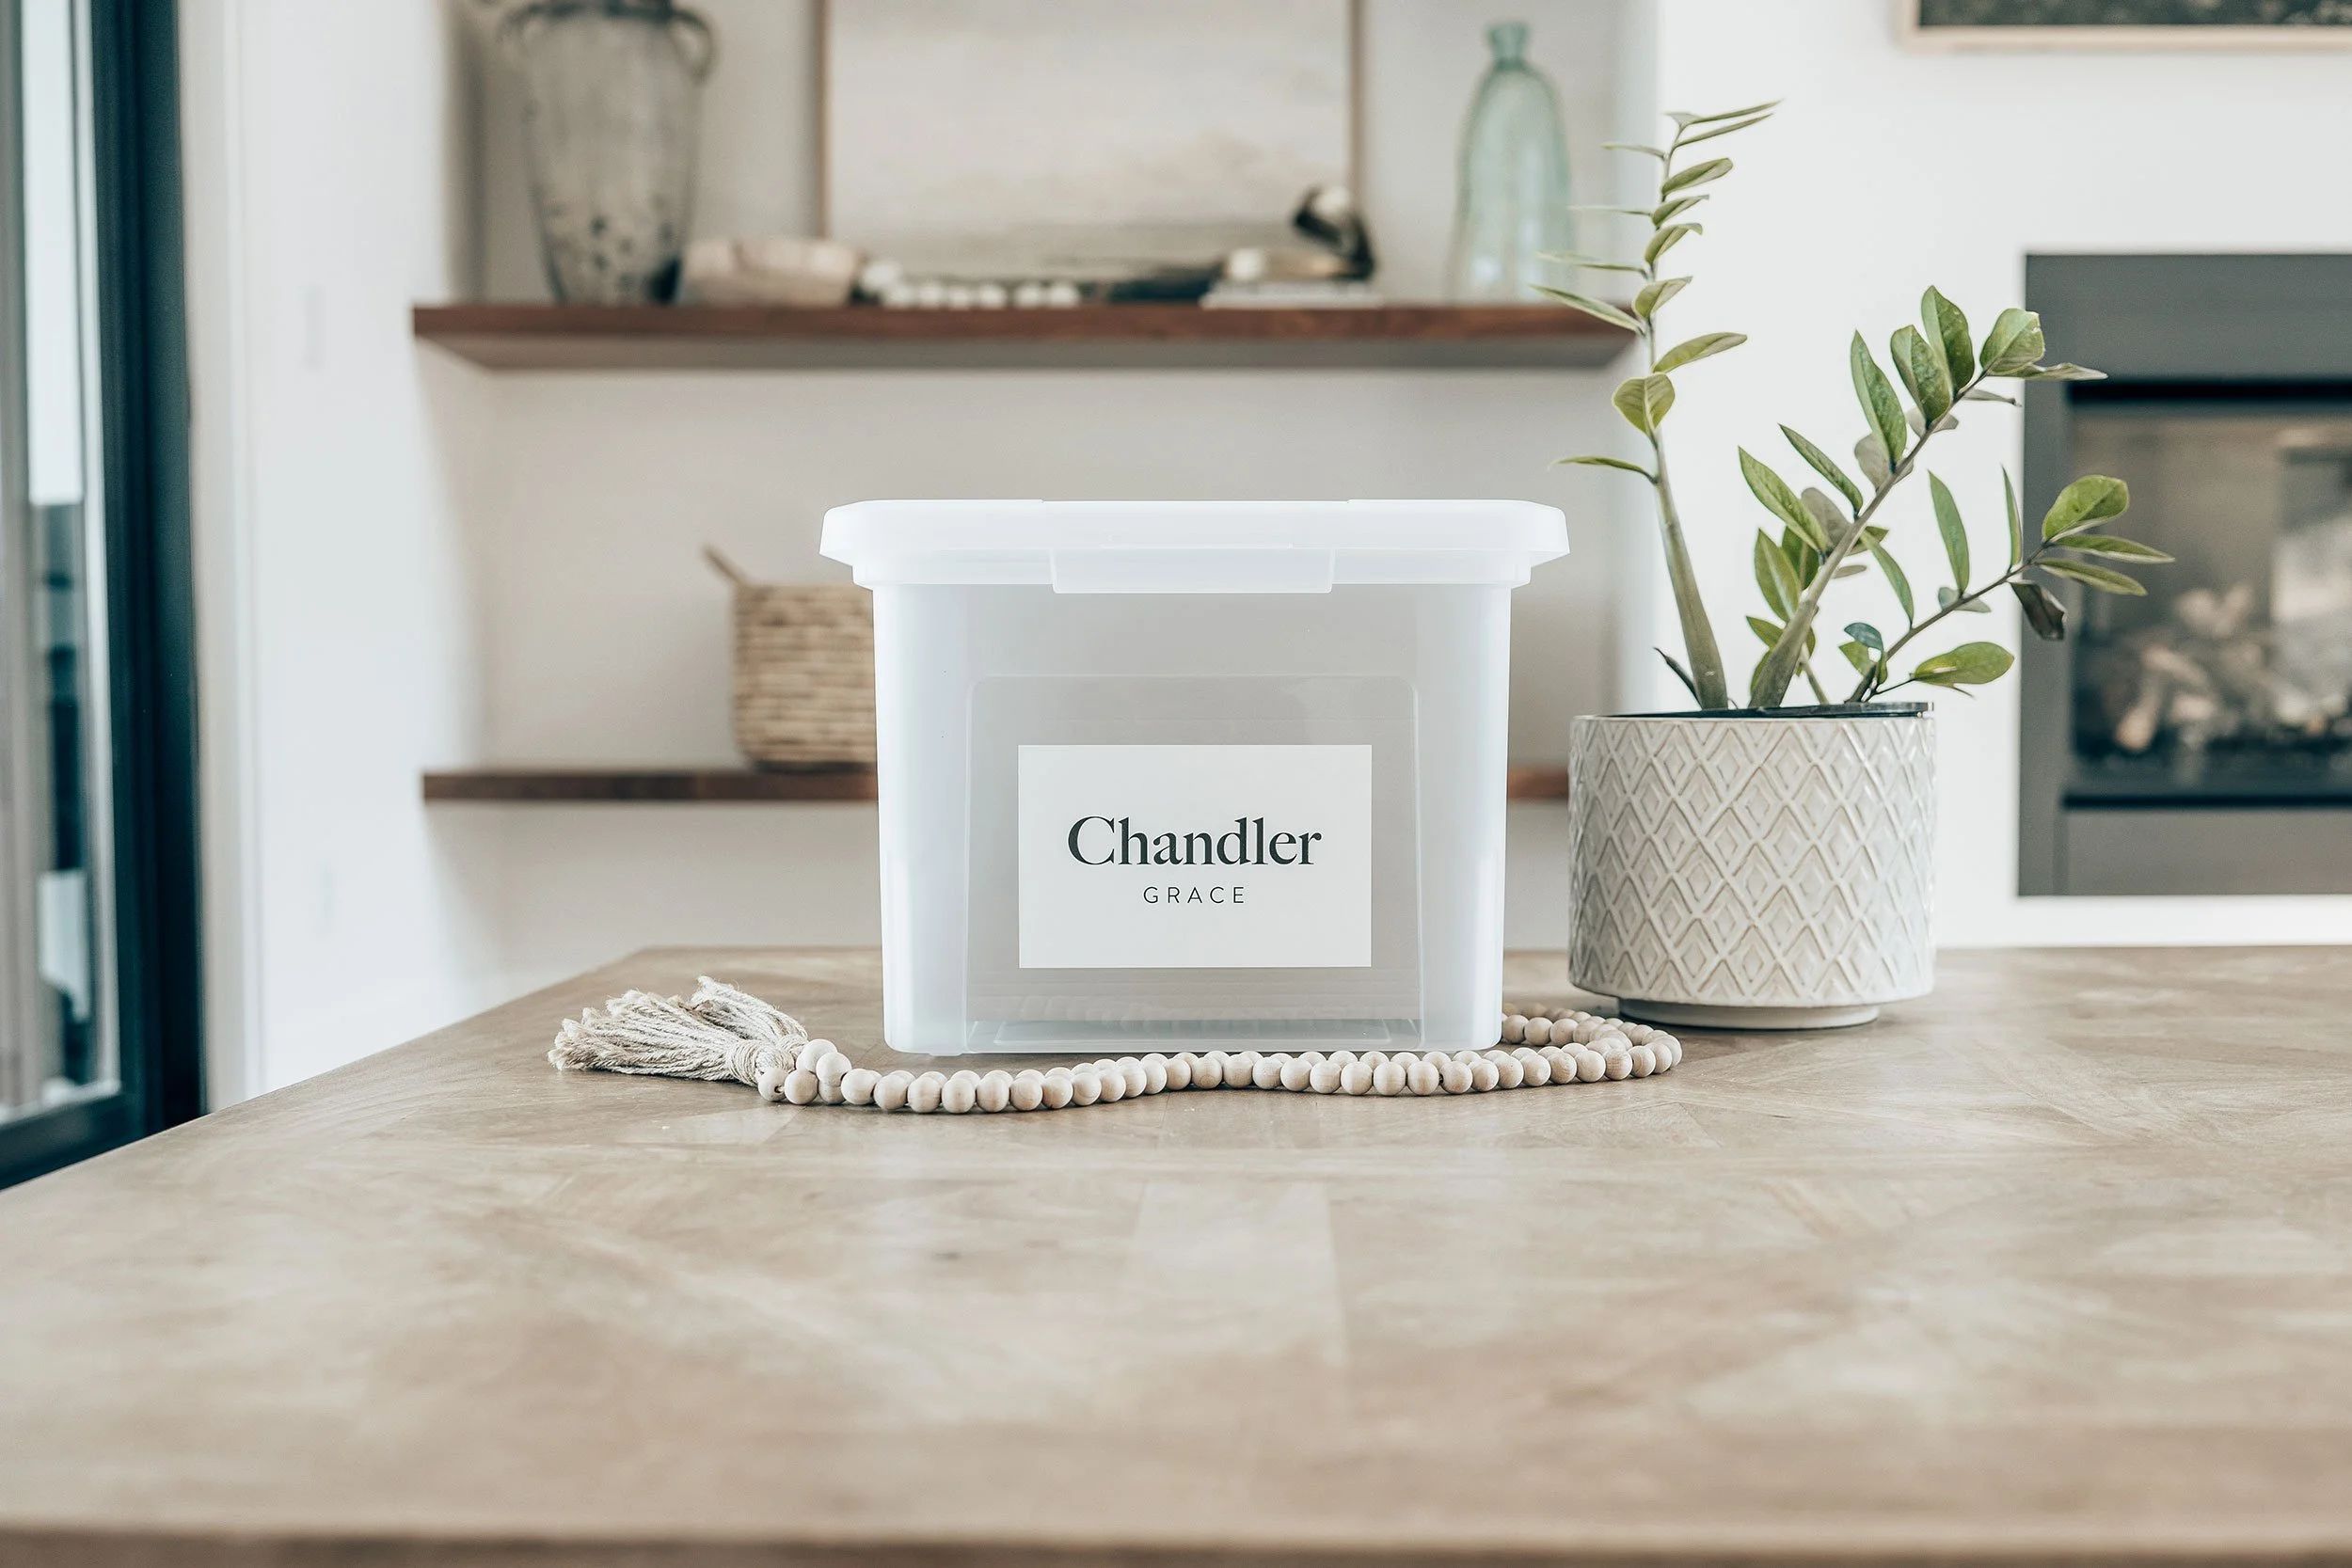
2. Add Your Child’s Name to the Box
Print or write a simple label with your child’s name.
You can:
Print a label from your computer
Use a label maker
Handwrite it on a tag
Attach a sticker label
Then, stick it right on the front of the box. It’s such a small step, but...
Suddenly this box becomes their story.
Starting right this minute, your child will feel so special just seeing their name there.
Now we create a simple structure inside the box.
3. Choose Folders for Each Grade
Next, you need to find folders that fit your box. It’s great if you can find some that aren’t standard-issue olive green. Pick a color and design that fits your aesthetic.
You’ll need at least one folder for every school year.
Start with:
Preschool
Pre-K
Kindergarten
1st Grade
2nd Grade
3rd Grade
…and continue all the way through high school
Yes, even if your child is only three right now.
Because one day, before you know it — they’ll be walking across a graduation stage, diploma in hand. 🥹
Place the folders inside the box in order.
Now every grade already has its place waiting. And when something comes home from school, you immediately know where it goes.
The next step makes the whole system easy to maintain...
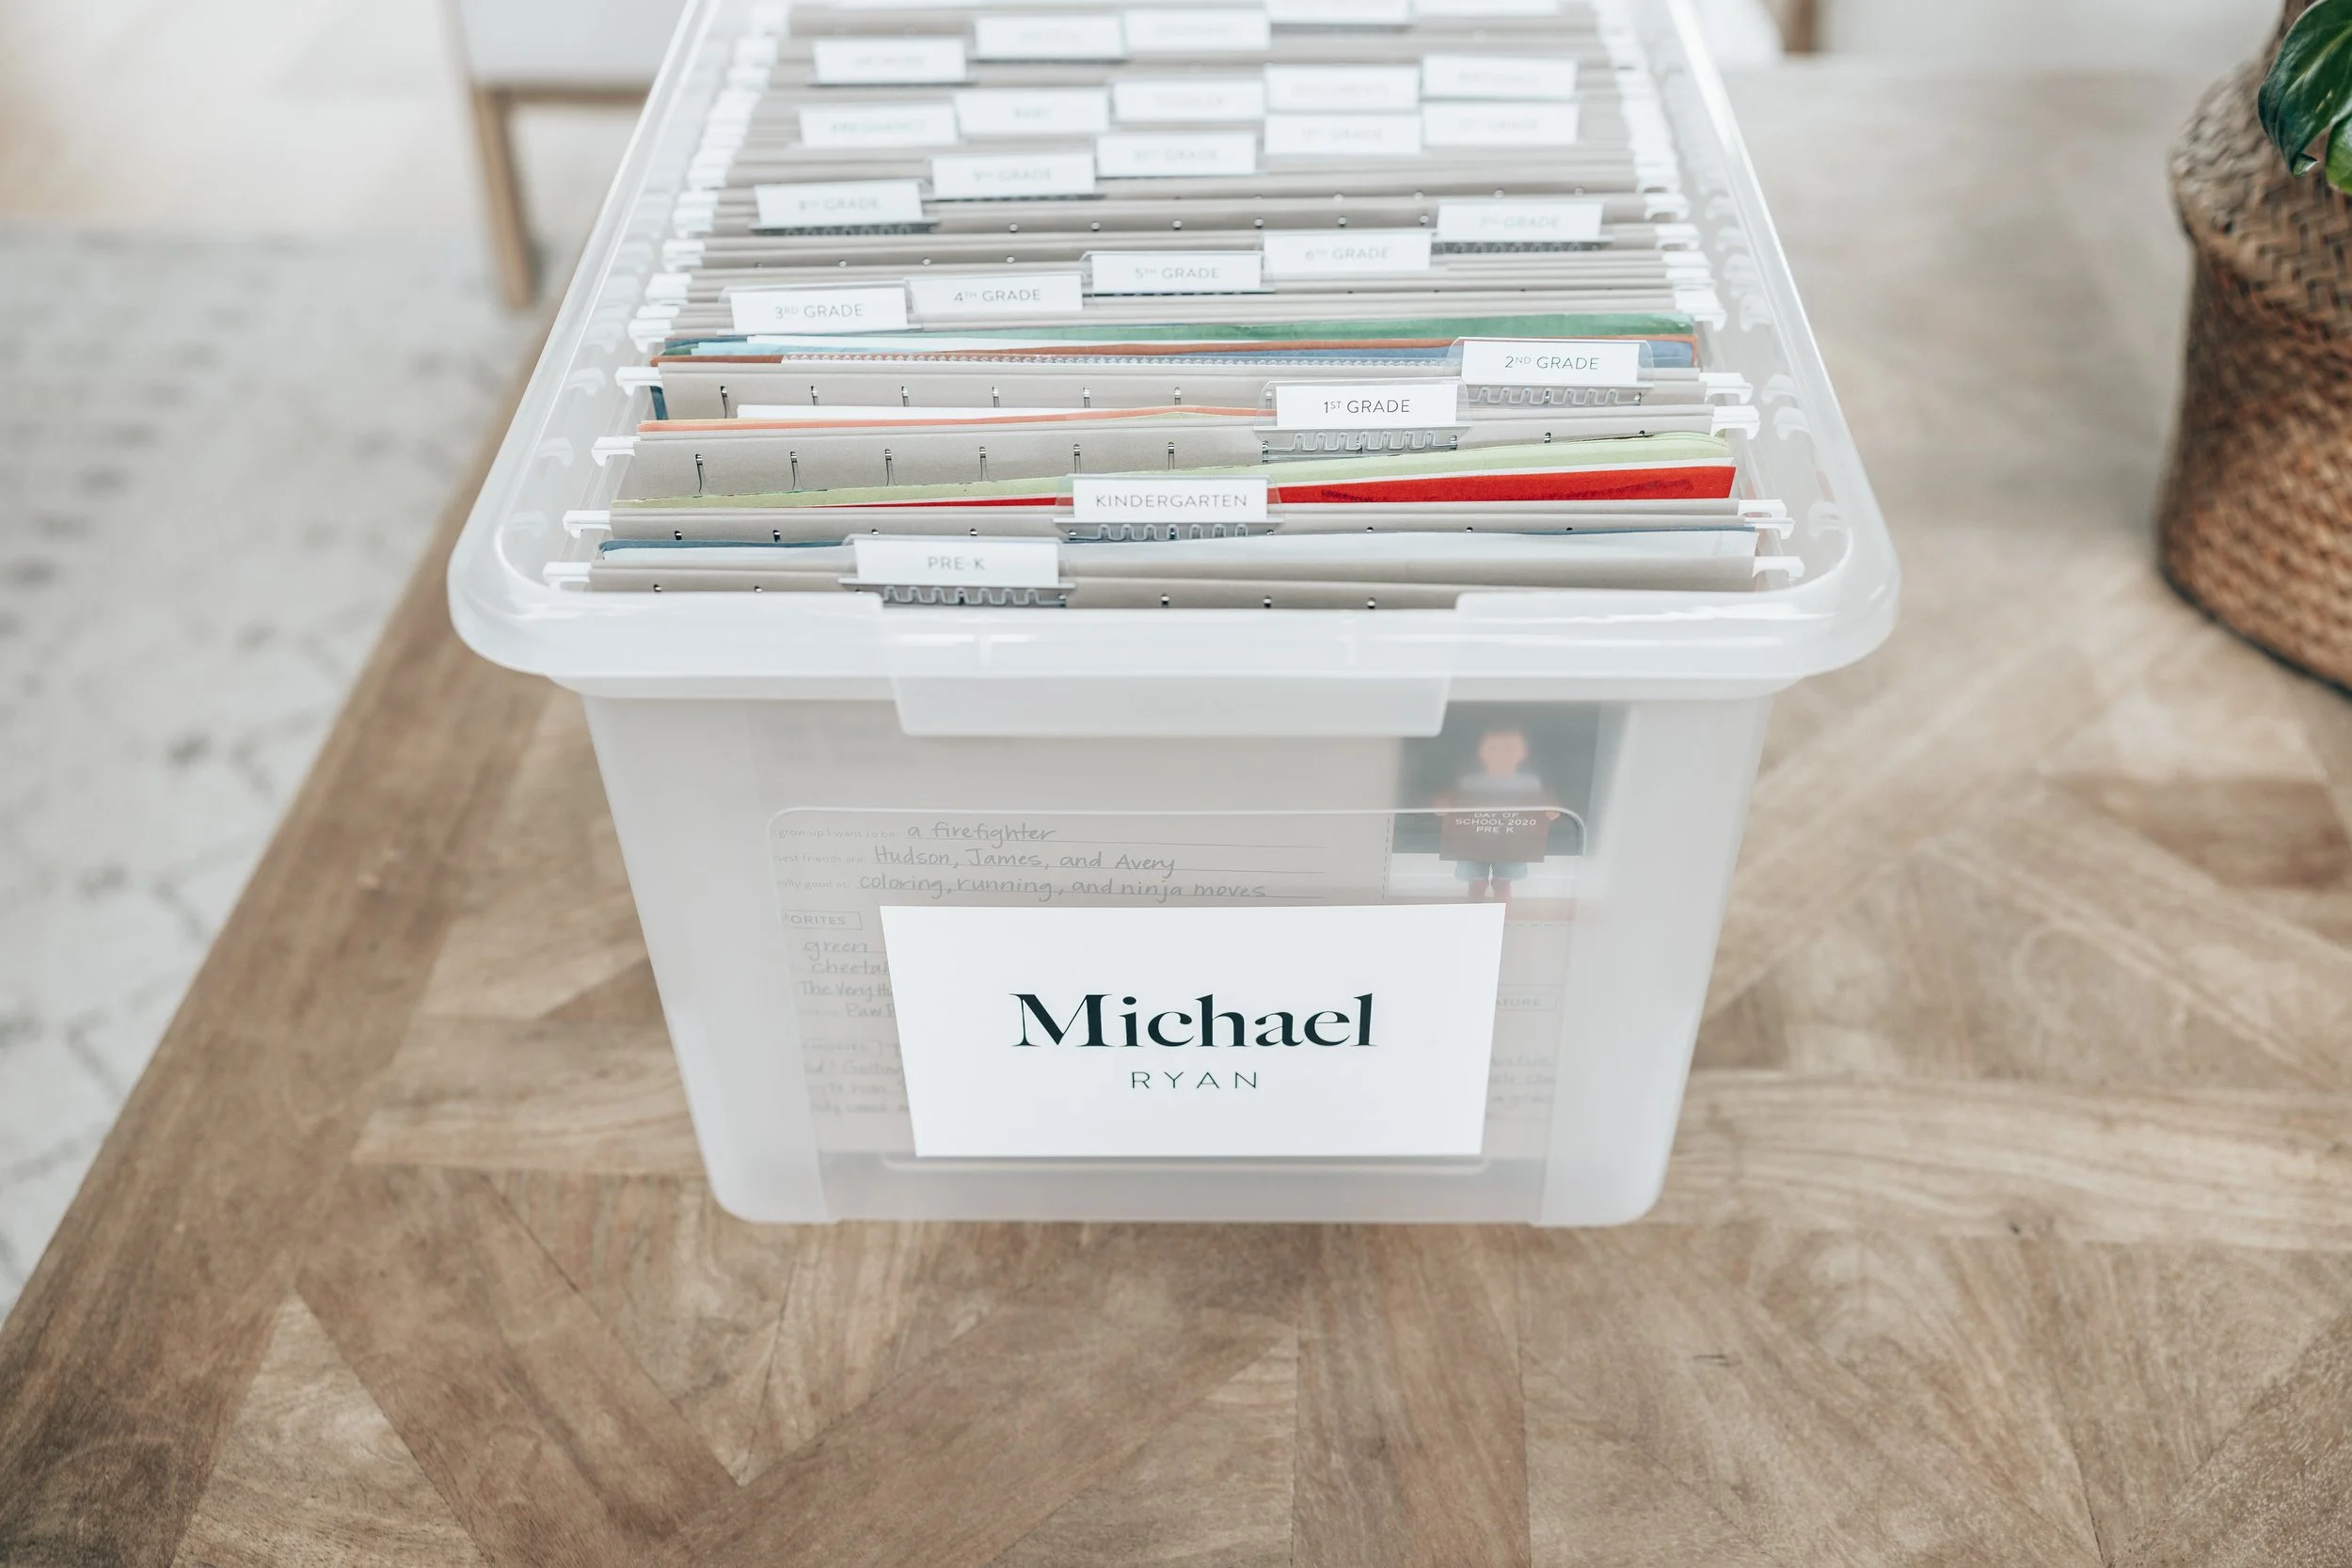
4. Label Each Folder With Tabs
Add clear tabs and labels to each folder so you can quickly find the year when it’s time to file the memories away.
You can write things like:
Preschool
Kindergarten
1st Grade
2nd Grade
It’s also a lifesaver to add a few additional folders for other categories like:
Sports
Activities
Health
Or whatever is important to your family
Aim for about ten extras.
Simple.
When your child brings home something special, you just open the box, flip to the right year, and drop it in.
No sorting piles later.
No “I’ll organize this someday.”
Just a simple system that works.
The next step is where you make the memory box truly meaningful.
5. Add School Photos and Annual Interviews
Inside each grade folder, include two simple things every year.
First, their school photo…
Slip your child’s annual school photo into the folder. Or glue it onto the outside of that grade’s folder.
That way, you can see how much they change from one year to the next.
🤓 The missing teeth
✂️ The new haircut
👩 The suddenly grown-up smile
Seeing those photos lined up over time is pure magic.
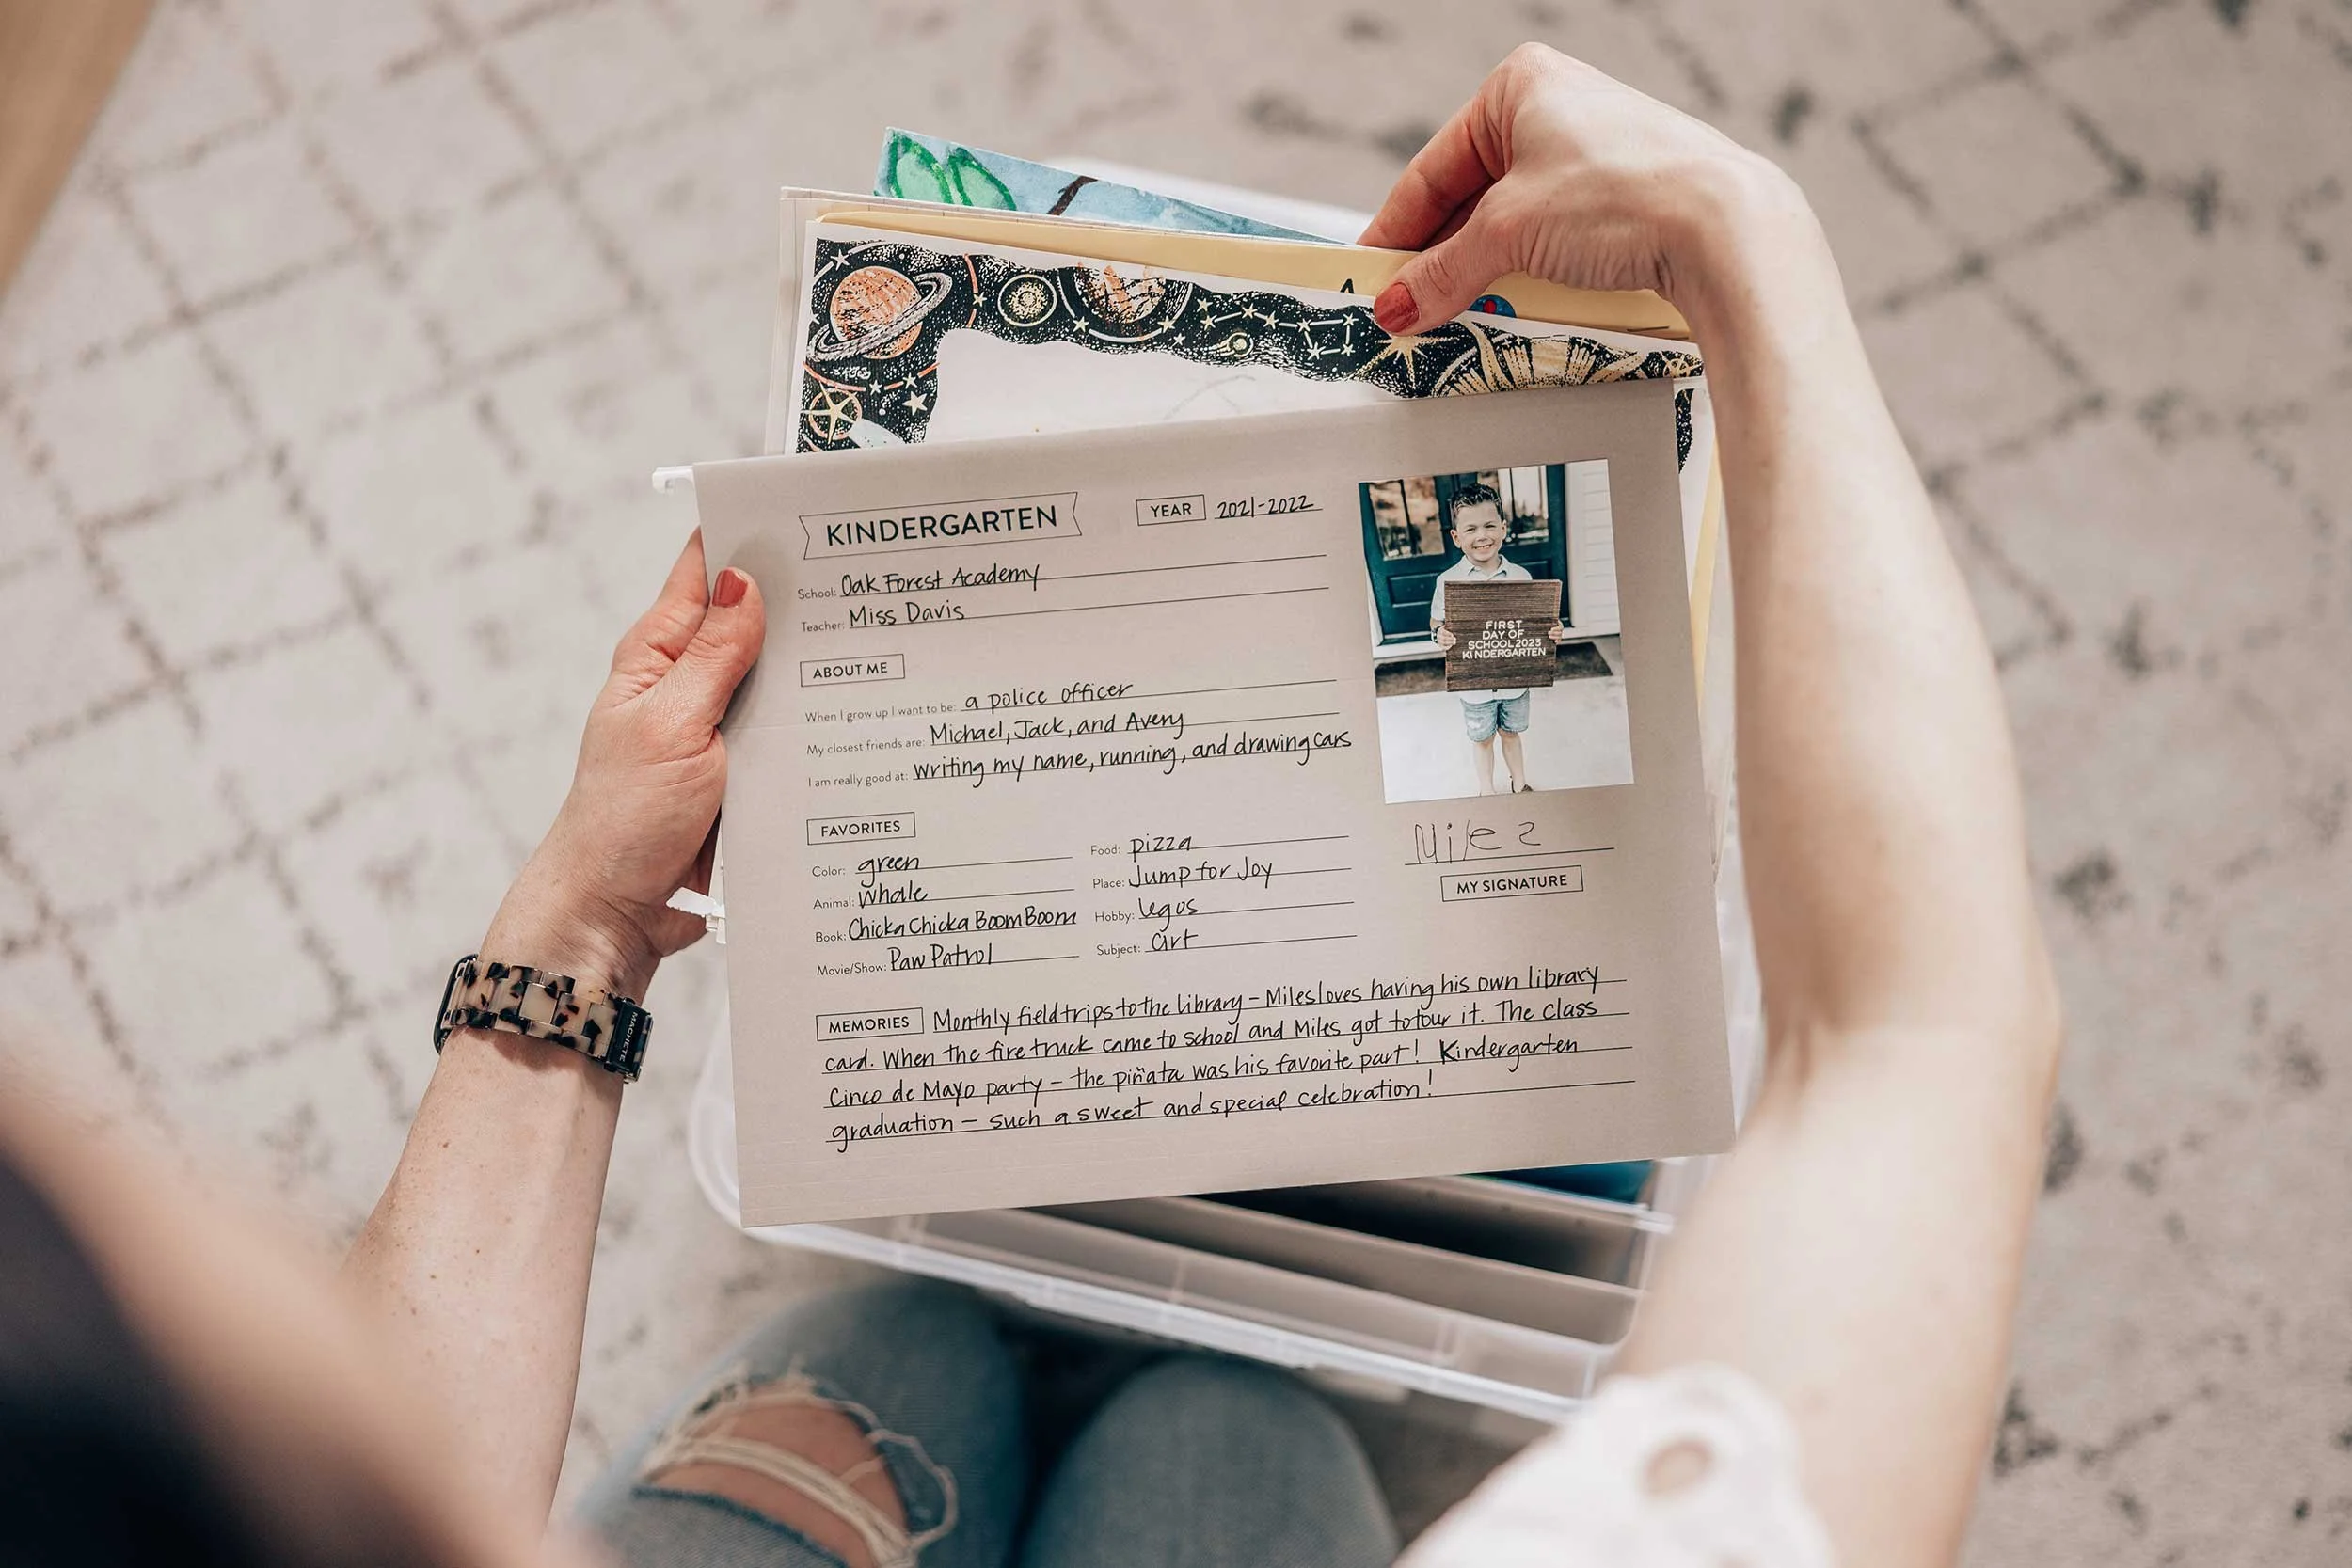
Second, include annual interviews…
Once a year, ask your child a few fun questions, and write their answers down.
Include questions like:
What’s your favorite food?
Who’s your best friend?
What’s your favorite subject at school?
What do you want to be when you grow up?
What is your favorite movie or show?
Their answers will make you laugh.
And later…they’ll make you cry a little, too.
Because kids change so quickly.
One year, they want to be a dinosaur.
The next year, they want to be a firefighter.
…and a flying, kitty-cat, ballerina the next!
Capturing those little details is one of the sweetest parts of memory keeping.
And that’s it! (Well, almost.)
A Quick Reality Check for Busy Parents
If you’re reading this and thinking:
“This sounds wonderful… but there’s a 98% chance I’ll never actually buy all the supplies, cut out all the labels, and figure out how to print the name tag at the right size to fit the box.”
You are not alone.
Between school drop-offs, homework, sports practices, dinner, laundry, and life…organizing memories can easily fall to the bottom of the list.
That’s actually why I created The School Years Memory Kit.
Instead of gathering boxes, folders, labels, name tags, and interview pages yourself…
Everything is already done for you.
The kit includes:
A beautiful keepsake box
Folders that fit in the box (choose from four gorgeous colors)
A personalized, customizable adhesive name label
Pre-printed folder labels for every grade, plus life-saving extra categories
Guided yearly interview questions on every grade-level folder
And space for annual school photos
So instead of spending an afternoon setting up a system…
You can start saving memories right away. 🚀
Either way, here’s what you need to know to make your new memory box work for you…
3 Common School Memory Box Mistakes to Avoid
When parents try to create a memory box, a few things can make it harder than it needs to be.
1. Saving everything
You don’t need every worksheet.
Just the highlights.
2. Waiting until papers pile up
It’s much easier to start now — even if you just add one folder today.
3. Forgetting the little details
The artwork is wonderful.
But the stories about your child at that age are what you’ll treasure most later, so don’t skip the interview questions.
And that’s it!
Setting up a school memory box really comes down to five simple steps:
1. Choose a memory box
2. Add your child’s name to the box
3. Set up folders for each grade
4. Label the folders so they’re easy to find
5. Add a school photo and short grade-level interview
A few minutes each year.
And suddenly, your child’s entire school journey is preserved.
It’s simple. Realistic. And something almost any busy parent can keep up with.

And One Day — You’ll Be So Glad You Did This
You’ll open that box again.
You’ll see the kindergarten photo
The crooked handwriting
The first story they ever wrote
And you’ll wonder how those years flew by so quickly.
Because they always do.
Which is exactly why saving these little moments now matters.
So don’t wait to start.
If you want to make it even easier, explore the done-for-you version of this system: The School Years Memory Kit.
And we’ll get everything you need gathered and shipped to you, so all you have to do is start adding the memories.
And, years from now, that one simple box will hold all of your favorite memories from your child’s growing-up years.
xo
Tracey